How to Make Appliques
This step by step guide will show you how to make appliques by hand, how to apply them to your project, and how to sew the appliques using a regular sewing machine.
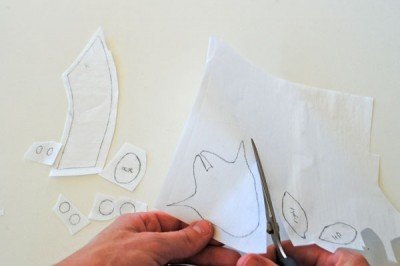
1. Trace the applique design piece(s) from the template onto the paper side of fusible webbing, leaving about ½ inch between each piece.
2. Cut out the piece(s) roughly leaving about 1/4 inch of webbing around the tracing lines.
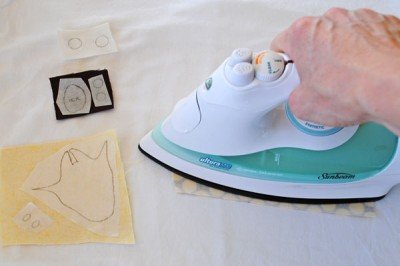
3. Place the fusible webbing piece(s) onto the wrong side of chosen fabric, then fuse for a few seconds with a dry iron.
4. Cut out applique piece(s) neatly on the lines.
Tip: when cutting out small, fiddly pieces, hold the piece with tweezers instead of your fingers.
5. Peel off paper backing, then position applique pieces on project (webbing side down), layering the pieces as indicated on the placement guide.
6. When happy with the arrangement, place a press cloth over the design, then fuse in place with an iron.
Note: Iron temperature and fusing time will depend of the type of fabric and fusible webbing you are using. Please refer to the instructions that come with your fusible webbing for more details. I recommend using a press cloth as it will help prevent scorching the applique and the fabric you’re fusing it to.
7. If you wish to stitch around the edges of the applique, cut a piece of stabiliser about 1-2 inches wider all around than the applique, and position it on the wrong side of your fabric, underneath the applique.
8. To machine applique you don’t need a fancy machine, just a basic machine capable of doing a zigzag stitch. This is my trusty machine. It is basic, non-computerised, uncomplicated and does a great zigzag stitch!
Stitch around the perimeter of your applique pieces using a tight zigzag stitch on your sewing machine, or alternatively, stitch by hand using a blanket stitch. Change your thread colour as you go to match (or contrast if you like) with each applique piece. When stitching curves and corners, put the needle down into the fabric on the opposite side to the way you are going to turn, then lift the foot and pivot the fabric.
Here’s a few more tips and techniques that I use that you may find helpful:
• I use bobbin fill thread in the bobbin. It is a fine, shiny, lightweight, strong polyester thread and it usually comes on a large cone. Because it is so fine you can fit heaps on the bobbin, meaning less bobbin changes! For the top thread I use a standard polyester thread.
• I use a Janome blue tip needle as they help to prevent skipped stitches, but a universal size 70 or 80 needle will also do the job.
• Use an open-toe, clear foot so you can see what you are doing.
• I set the zigzag stitch width to about 3 (although if the applique design has small pieces I usually reduce the stitch width when going around those pieces – for the tiny nostrils on the giraffe I changed the stitch width to 1.5). The stitch length I set to just above zero. You will need to experiment on your machine to find the right stitch length. Start it at 0.5 and then work backwards until the stitches are close together with no gaps in between, but not so close that they bunch up and don’t move easily under the foot. Practice on some scraps first.
• On my machine I usually need to loosen the upper thread tension a little. The upper thread should be visible on the wrong side of the fabric, but should be flat on the right side. The bobbin thread should not be visible on the right side of your fabric. You may need to play around with the bobbin tension as well to get this right.
• Aim to have the stitches two thirds on the applique fabric and one third on the background.
• Remember, take your time, and practice makes perfect!


