How to transfer pattern markings to fabric
Most of my stuffed animal patterns require you to transfer markings for the facial features onto the fabric shapes. There’s a couple of different methods I use depending on the fabric type I’m using.
The light-box / window method
This is my go-to method if the fabric I’m using is see-through when held up to a window or light source.
Place the paper pattern piece on a light-box or against a well-lit window, position the fabric piece over it (right side facing up) and trace the markings onto the fabric with a disappearing ink/water erasable fabric marking pen. If your fabric is too dark for the pen to show, you could also use a chalk pencil.

The stencil method
The second method is to use the paper pattern like a stencil. This is what I do when my fabric is too thick or not see-through enough to use the window method.
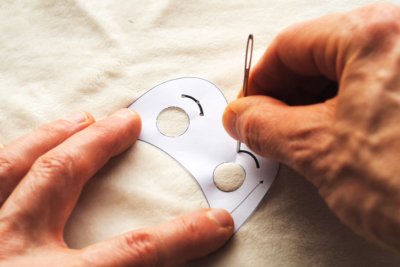
Cut the eye shapes out of the paper pattern piece and discard them.

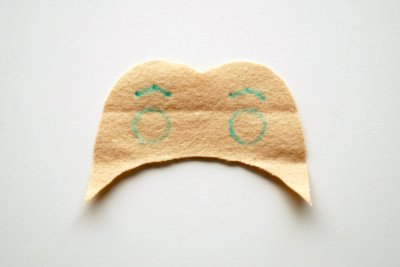
Place the pattern piece on top of the fabric shape and trace around the eye shapes with an erasable fabric marking pen.

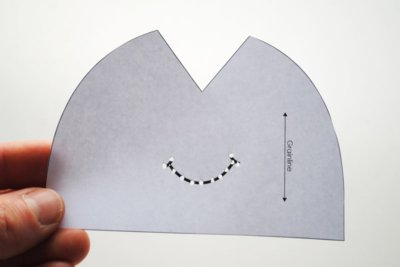
To create a stencil to trace markings such as eyebrow, eyelash and mouth shapes, take a large needle and punch 3 or 4 holes through each marking on the pattern piece – 1 in each end and 1 or 2 in the middle.

Then using the erasable fabric marking pen, poke the pen through each hole to make a mark on the fabric.

Remove the paper pattern and join the dots.

Here is an example of the mouth.


Let me know if you have any questions.


